Showing posts with label Baking. Show all posts

Aug 4, 2011

Redcurrant Cupcakes.

I love how in Copenhagen we can live in the city but still walk to forests and shrubs where we can pick berries. I  love redcurrants especially their tart sweetness. I picked a bunch of them from some shrubs at Holte yesterday and washed them before I got the "dont wash them if you want to freeze them" advice. We usually toss redcurrants into salads but this time I had small basket full of them- too much for salad, too little to be turned into preserve... so cup-cakes it was. I used lemon zest and lemon juice in the batter which makes perfect love to the tartness of the berries. My kitchen smells so good, I would lick the air if I could.

My cupcakes look a imperfect because I don't own a cupcake mould. In my head, a mould ONLY for cupcakes is a bit overdoing it. But that has not stopped me from wishing for it every birthday and Christmas, but everyone else seems to think it is a silly thing too. Dammit, tangent! Here is how I made them.

INGREDIENTS

·         170g plain flour
·         2 tsp baking powder
·         140g sugar
·         2 eggs, separated
·         8 tbsp sunflower oil
·         6 tbsp milk
·         Juice and zest of ½ lemon
·         170g redcurrants, stripped from stems


METHOD
Preheat the oven to 180C/350F.
In a big bowl, sift together flour and baking powder. Grate lemon zest over the flour.
In another bowl, mix together sugar, egg yolks, oil, milk and lemon juice.
Whisk the egg whites until stiff and fold into the cake mixture. Stir in the redcurrants, put batter into cup cake forms and bake for 15-20 minutes.
I plan to eat mine just the way they are or maybe with some sour cream on the side, but that should not stop YOU from adding a frosting or topping of your choice.

May 2, 2011

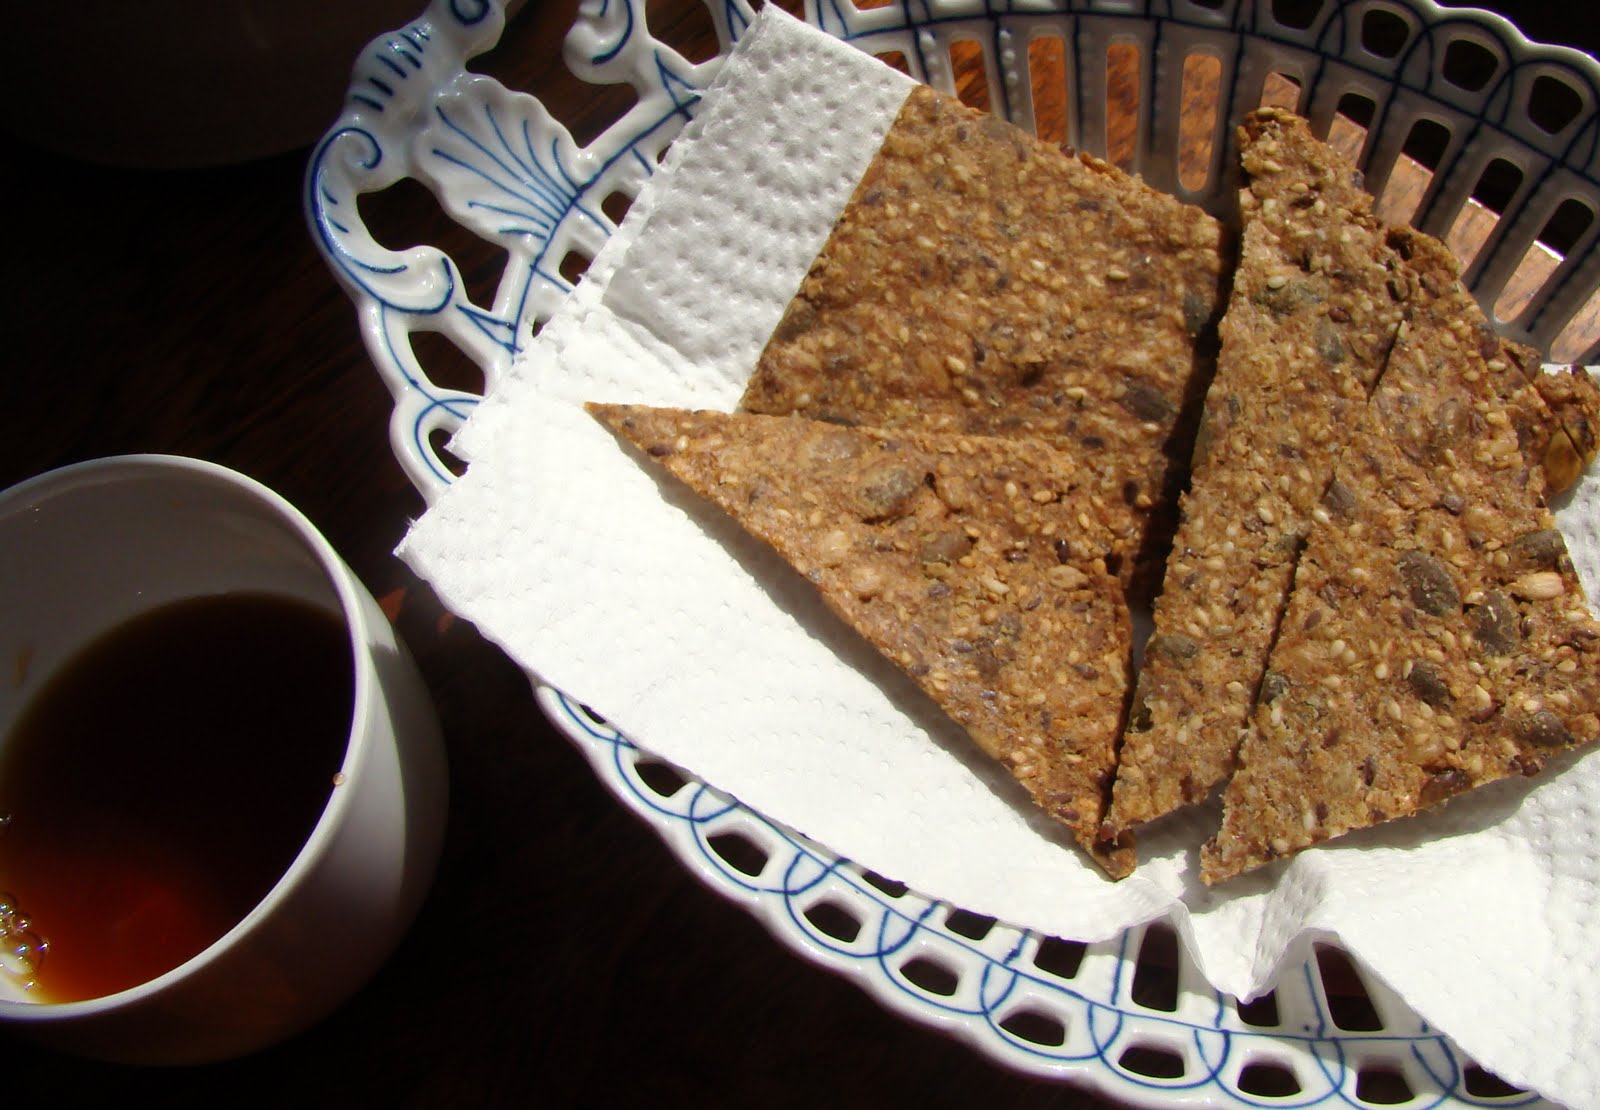
Hanne's Knækbrød / Danish Crisp Bread

If like me, you HAVE TO HAVE a little something with your chai, this knækbrød – Danish crisp bread recipe is just for you. Hanne served it at her birthday party and I asked her for the recipe with my mouth full, without as much as a ‘thank you for the meal’. Pictures don’t do justice it’s really mild but ‘explosion of flavors’ from the seeds taste. Sorry, the ‘explosion of flavours’ is an inside- you-wont-find-it-funny-if-you-weren’t-there joke from when a friend found it to be the only way to describe the taste of this knækbrød. The possibilities are endless. You can eat it smeared with a little butter, a cheese dip or like the Danes like to do- pile it up shrimps, eggs or every imaginable food in the universe. It is so easy to make and stays for up to 15 days (or maybe more... mine got eaten within 10 days) It takes just 3 very easy steps, so it wasn't difficult even though the recipe was in Danish. I used a decilitre cup. If using a US size cup increase the baking powder and salt by half. 

INGREDIENTS:
1 cup coarse oatmeal / Havregryn
1 cup flax seeds / Hørfrø
1 cup sesame seeds / Sesamfrø
1 cup pumpkin seeds / Græskarkerner
1 cup sunflower seeds / Solsikkefrø
3 1/2 cup rye flour/ Rugmel (You can also use whole-wheat flour)
2 teaspoons salt
1 teaspoon Baking Powder
2 cups water
1 cup vegetable or olive oil

Step 1: Mix all ingredients together in a bowl. Knead VERY lightly. 

Step 2: Divide dough into two portions. Lay one portion on a baking sheet the size of your baking tray. Put another baking paper on top of the dough. Roll it into a thin sheet using a rolling pin. Repeat process with the other half of dough.

Step 3: Peel off baking paper on top. Using a knife cut sheet into rectangular or any desired shape.

Step 4: Preheat oven to 175C and bake for 20-25 minutes. And tadah!

Tip: Check at the 10 minute mark. The hand rolled sheets vary in thinness so some bake faster than others.

Feb 28, 2011

Chococcino Cupcakes with Chocolate Buttercream Frosting.

This cake could also be named Possible Death by Salmonella. This recipe should make 22-24 cupcakes but I think I ate about 2 cupcakes worth of batter and ended up with only 20 cupcakes. My kitchen smelled so delicious even as I was mixing the batter, I couldn't help but eat spoonfuls of it. It can also be called The Best Chocolate Cupcake I Have Ever Baked! The kind that made people go OH MY GOD. It was my birthday on the 25th, Friday. I invited people over on Sunday and Saturday. It didn't make sense to bake two cakes, not after I've just managed to squeeze back into my jeans, no sir. So I made cupcakes instead, also known as portion control cakes. They turned out spongy with an intense chocolatey taste with a hint of bitter coffee. Woe me, I don't have cupcake forms, but the batter was thick and it held well in just the cupcake paper shells.  The frosting looked like designer turds, so I poked them with a fork to make them look less turd like.

INGREDIENTS FOR CUPCAKES ( Makes 20)
  • 200g unsalted butter, softened
  • 1 tsp baking powder.
  • 100 grams good-quality cocoa powder
  • 125 grams  self-raising flour
  • 200 grams golden caster sugar
  • 4 eggs 
  • 1/2 teaspoon salt
  • 2 tbsp milk 
  • 4 tbsp instant coffee dissolved in  4 tbsp of boiling water. 
*Tip:  You can substitute half the butter with a neutral vegetable oil. I have made it with 50% butter and 50% canola oil in the past and it tastes just as good with not much difference in the texture.

METHOD
  1. Heat oven to 180 C
  2. Sift flour, cocoa powder and baking powder into a large bowl, then tip in all the other sponge ingredients (Eggs, milk, coffee mixture and sugar)
  3. Using an electric whisk, beat everything together until smooth. 
  4. Divide the batter into cupcake forms and bake for 15 minutes. Check by inserting a wooden toothpick, it should come out clean.
  5. Leave on rack to cool before frosting.


FOR CHOCOLATE BUTTER-CREAM FROSTING
  • 6 tablespoons butter, softened
  • 2 2/3 cup powdered caster sugar
  • 1/2 cup cocoa powder
  • 1/3 cup milk
  • 1 teaspoon vanilla extract.
  • Pinch of salt.
    Beat the ingredients together till well blended and creamy but stiff. If you own a frosting cone, lucky you. I put mine in an improvised plastic bag cone and squeezed. *I added extra tablespoons or half of  sugar, milk and cocoa powder at few points to get desired consistency.

* You can also use this recipe for a layered cake: Grease two, 20 cm cake tins, divide batter into tins. Tap tins to release any trapped air. Bake at 180C for 25 minutes or till a tester comes out clean. Allow to cool. Turn one layer upside down and spread frosting evenly. Top with the other layer and frost top.


* Tip - My frosting is a deep brown because I used caster sugar. You could replace it with regular white confectioners sugar for a lighter brown colour. That will give some contrast and make your cupcakes look prettier.


Feb 19, 2011

No Fuss Corn and Spinach Quiche.


This was yet another desperate dish born from the icy cold depths of my freezer. It was another what the hell to eat for dinner day. Thankfully, my freezer is always stocked with frozen spinach and corn. It was a desperate dish but my dinner companion loved it and insisted it go on the blog. So here I am filing the recipe away for future reference. Admittedly, I used a store bought crust mix; it was a life is too short to be kneading dough moment.  But I am sharing a crust recipe the lovely Missus Petersen shared with me. She likes and knows her food, so I am confident that any recipe she recommends is tried and tested. The rest was just something that took its own flow with whatever I had at hand in the kitchen. Without further ado, here is a comforting, desperate meal for hurried days.

Ingredient for crust:
2 cups flour
2 tsp baking powder
1 tsp salt
1 cup butter
1/3 - ½ cup cold water
1 tbsp vinegar

Ingredients for Corn and Spinach filling.
150 grams sweet corn
300 grams frozen spinach (defrosted)
1 tsp olive oil
1 medium onion, chopped
3 cloves garlic, finely chopped
1 tsp fresh ground black pepper.
1 tsp dried herbs (Herbes de Provence or Basil, Thyme, Fennel, whatever you’ve at hand)
1/2 tsp cumin
1 teaspoon dried dill weed.
Salt to taste
2 eggs, beaten.
1/2 cup grated parmesan


 Making the crust: Combine flour, baking powder and salt. With a pastry cutter, work in butter. Combine water and vinegar and stir into the flour mixture. Turn out onto floured board and knead for about 1 minute. Form into a ball, wrap in wax paper and chill. To use, roll out on floured board to fit pie form. (We won’t be pre-baking the crust, so roll it out no more than 1/2 a centimetre thick) Line the sides and bottom of a 9 inch pie form. Keep aside in the fridge.

Making the filling: 
  • Pre heat oven to 190 C
  • Bring a pan to heat on medium and add oil. Add cumin seeds. Add chopped onion, add garlic and sauté.
  • Add spinach and corn when onion is translucent. Stir in all dried herbs, dill weed, pepper, salt. Sauté for no more than 3 minutes and allow it to cool.
  • In the meanwhile, break eggs into a bowl and beat along with a pinch of salt.
  •  Bring out pie form lined with crust. Sprinkle a thin coat of grated parmesan cheese just to cover the surface. Add in the spinach and corn mixture, pressing gently.
  • Pour beaten egg over the pie crust filled with spinach and corn covering evenly
  • Sprinkle parmesan cheese over the pie, covering evenly.
  • Bake for 30 minutes. We ate ours with a simple tomato and basil salad.

Feb 8, 2011

Carrot Cake with Walnut Cream Cheese Frosting.


My friend Dora, who brings me pretty Huichol jewellery from her home country, Mexico, hosted a party at her place. The party also multi-tasked as a baby shower for our friend Elisa. Seeing as there would be enough alcohol for the non pregnant men and women, I figured Elisa's yet to be born baby should have some veggies, even if in cake, so I baked a carrot cake. The base recipe and instructions are from Smitten Kitchen. I have baked this cake a few times, but always found it far too moist and oily, especially since it gets so much moisture from the carrots. Your fingers get stained with oil if you touch the cake, kind of oily. The recipe I am sharing below is the one I used for this cake; I used less oil and sugar and substituted half of the oil with buttermilk. It turned out perfect, still moist and tasty with more sponge to the texture. This cake tastes better if you eat it after one day.  The cinnamon, nutmeg and ginger flavours really come into play making it worth the wait.  
Some people say that carrot cakes are eaten mainly for the frosting. I disagree and was loathe to put frosting on this one, since it tasted so good by itself. But the cake was going for a party and needed some make up on, so I topped it with a cream cheese and walnut frosting.

Ingredients

2 cups/ 250 grams all purpose flour
2 teaspoons baking soda
1 teaspoon salt
2 teaspoons ground cinnamon
1/2 teaspoon ground nutmeg
1 teaspoon ground ginger ( I often use fresh chopped ginger!)
2 cups/ 250 grams sugar
1 1/4th cup/ 250 ml (1 1/4 cups) canola oil
4 large eggs
3 cups/ 750 grams or 3 cups grated peeled carrots
1 cup coarsely chopped walnuts (optional)
1/2 cup raisins ( optional)

Method
Preheat oven to 175°C.
  1. Whisk flour, baking soda, salt, cinnamon, nutmeg and ginger in medium bowl to blend. 
  2. Whisk sugar and oil in a separate large bowl until well blended. Whisk in eggs 1 at a time. Add buttermilk and blend. Add flour mixture and stir until blended. Stir in carrots (and walnuts, if using them). 
  3. Divide batter and pour into two 9-inch-diameter cake pans. Line bottom of pans with waxed paper. Bake the layers for about 40 minutes each, or until a tester inserted into centre comes out clean. Cool cakes in pans 15 minutes. Take cakes out of the pan and let them cool.
See how fast it disappeared!


Walnut Cream Cheese Frosting
100 grams cream cheese, softened
50 grams unsalted butter, room temperature
100 grams confectioners’ sugar
Handful walnut, roasted and chopped.
Few walnut halves for decoration.

In a stand mixer, beat all the ingredients except walnuts until fluffy. Add walnuts and mix with a spatula. Chill the frosting for 10 to 20 minutes, until it has set up enough to spread smoothly. To assemble a carrot layer cake, frost the top of one cake, place the other cake on top. Frost the sides and top, swirling decoratively. Refrigerate the cake for 30 minutes to set up frosting. The chopped walnuts give a lovely, nutty crunch to the sponge.

* My cake ( as seen in the picture) is not a layer cake because I chose to  use them as 2 separate cakes instead of layering them.

Feb 6, 2011

Red Velvet Cake with Orange Zest Cream Cheese Frosting.

Years behind trend, I finally baked my first Red Velvet cake for my Mum in Law's birthday. I finally get what the hype is all about. It was so moist and had a lovely slight tang from the vinegar and cream cheese frosting. The colour also makes it look 'festive'. And OMG the frosting! I couldn't resist licking the frosting off the bowl. I used a light cream cheese and it was the first cream cheese frosting my cheese hating husband ate voluntarily. He even took seconds!

There are so many variations of this recipe- with or without buttermilk, with or without vinegar, with or without chocolate. I adapted many recipes and used all 3. I wish I had skipped the cocoa or used a better quality because the slight hint of chocolate that is meant to be there, didn't  come through and it messed up the vibrant red colour it could have been. If you are using cocoa powder, use a premium quality, or skip it.  I assembled the layers and frosting at my MIL's place and forgot to bring my camera, which explains the phone pictures. Also, I suck at prettifying, so ignore the sloppy frosting work. I frosted the top and the sides were frosted by my MIL's blacksmith friend. Now you know why the cake looks like it suffers from multiple personality disorder.


We forgot to buy candles and used a horrific flower candle contraption we found at my MIL's place. Formed like a lotus, it had petal candle holders, the centre shot out a mini fountain of flame and played music! Classy! ;)

To make one 9 inch layer cake, you will need
  • 2 1/2 cups self-rising flour
  • 1 teaspoon baking soda
  • 1/2 cup unsweetened cocoa powder
  • 1 1/2 cups sugar
  • 1 cup vegetable oil
  • 2 large eggs, lightly beaten, room temperature
  • 1 teaspoon white vinegar
  • 1 teaspoon pure vanilla extract
  • ½ teaspoon salt
  • 1 cup whole buttermilk
  • 2 1/2 tablespoons red food colouring
  • Vegetable-oil to coat pans.

  1. Preheat oven to 150 Celcius. Spray two baking pans with cooking spray and line with wax paper. Set aside. In a medium bowl, sift together flour, cocoa powder, salt and baking soda. Set aside.
  2. In a medium bowl, beat sugar and vegetable oil till well blended. Add in eggs one at a time. Add vinegar and vanilla. With an electric mixer, beat until light and fluffy, about 3 minutes. Gradually add flour mixture and buttermilk alternately till flour is blended. Add food colouring. Beat to combine.
  3. Divide batter among pans; each pan will be about half full. Tap pans on counter to remove bubbles. Bake for  40 minutes or until tester comes out clean. Let them cool.
  4. To assemble- invert cake layers upside down. Using a spatula, spread a thin layer of frosting. Let it cool, so this frosting acts as a layer to apply more frosting. To frost the top and sides of the cake, work from the center toward and over the edge, making sure to coat evenly.
    For Orange Zest Cream Cheese frosting
    • 226 grams cream cheese at room temperature
    • 226 grams unsalted butter at room temperature
    • 450grams confectioner's sugar, sifted
    • 1 cup finely chopped pecans
    • 1 teaspoon pure vanilla extract
    • Zest of one Orange.
    Directions
    Place sugar in a bowl and add orange zest, vanilla extract and blend. ( It is important that you do this step first, otherwise the zest tends to clump instead of distributing evenly *talking from experience*) Add in cream cheese and butter. With a hand-held electric mixer, beat until light and fluffy, about 2 minutes. Add pecans on low speed to combine. If too soft, chill until slightly stiff, about 10 minutes, before using. Tip: if you frosting is feels too runny, add some lemon juice so the cheese curdles again.

    Jan 30, 2011

    Easy White Bread with Pumpkin Seeds.

    Would you believe it? I baked my own bread! This will take some time getting over. Here's the proof.


    It was just right. Crisp crust, dense but fluffy inside. I may never buy white bread again. Not when I have a fresh, cheap, easy and healthier option that tastes way better than store bought ones. Bread was always a bit intimidating but this was almost too easy. My mother in law passed me down her old Kenwood mixer. I am gonna make that kneading hook work like it has never before in its rather long life. 30 years is a bit long for an electronic gadget to live right? But it works like a dream.

    Ingredients. Makes almost a kilo- 950 gram bread.

    • 500g white flour, plus extra for dusting
    • 2 teaspoon salt
    • 7g sachet fast-action yeast
    • 3 tbsp olive oil
    • 300ml water 
    • Handful pumpkin seeds (Optional) 
    Method.


    1. Mix flour, salt and yeast in a large bowl. Make a well in the centre, add oil and water . Mix well. Add 1-2 Tbsp more water if the dough seems a bit stiff. (Whole-wheat flour needs more water) Tip on a lightly floured work surface and knead.
    2. Once the dough is smooth, place it in a lightly oiled bowl. Leave to rise for 1 hour until doubled in size or place in the fridge overnight. Tip- to check if dough has been knead well, poke a finger in the dough. The impression should stay for a while. Dough should not rise back immediately.
    3. Line a baking tray with baking paper. Knock back the dough gently till some of the air from the yeast escapes and mould into a ball. Place it on the baking parchment and let it rise again for another hour till doubled in size. (Don't worry too much if it doesn't double exactly to proportion)
    4.  Heat oven to 200 Celcius. Dust the loaf with flour and cut a cross about 6cm long into the top of the loaf with a sharp knife. Bake for 25-30 mins until golden brown. The loaf should sound hollow when tapped underneath. Cool on a wire rack. 
      Time saver tip: Let the dough's first rising be done overnight in the fridge for a deeper flavour.

      Jan 17, 2011

      Chewy Oatmeal Raisin Cookies.


      There has been a slew of articles in Danish media about how packets of oatmeal found in Danish supermarkets may have fungus in them. My reaction to this gross news, but naturally,  was a - must. have. now - craving for oatmeal cookies. The recipe is from smittenkitchen.com. That site!! You must go there if only to drool at pictures. I love her recipes. She makes them out of a kitchen smaller than mine and with everyday appliances, it makes her recipes feel so much more do-able. The cookies turned out perfect. Crispy edges, chewy insides.

      For about 24 cookies or more (depending on the size of your cookies) you will need. Note - 1 cup = approx 2.5 Decilitres
      1/2 cup (1 stick or 113 grams) butter, softened
      2/3 cup light brown sugar, packed
      1 egg
      1/2 teaspoon vanilla extract
      3/4 cup all-purpose flour
      1/2 teaspoon baking soda
      1/2 teaspoon ground cinnamon
      1/4 teaspoon salt ( Use half a teaspoon, if you like more salt in your cookies)
      1 1/2 cups rolled oats
      3/4 cup raisins


      In a large bowl, cream together the butter, brown sugar, egg and vanilla until smooth. In a separate bowl, whisk the flour, baking soda, cinnamon and salt together. Stir this into the butter/sugar mixture. Stir in the oats, and raisins. Chill the dough for a bit in the fridge. I didn't time the chilling. It chilled for as long as it takes to hang dry a load of laundry. 

      Preheat oven to 350°F (175°C). Scoop and line up cookies two inches apart on a parchment-lined baking sheet. Bake them for 10 to 12 minutes (baking time will vary, depending on your oven and how cold the cookies were going in). Take them out when golden at the edges but still a little undercooked-looking on top. Let them sit on the hot baking sheet for five minutes before transferring them to a rack to cool. See if you have the patience to let them cool.

      *Colour will vary. Mine are a very dark brown because I used dark brown sugar instead of light brown.

      Jan 9, 2011

      Almond and Clementine Cake.

      WTF! Boiled clementines mashed with rind and all in cake batter?... is what you will think when you read the recipe. I know, I've been there. I had a bag of clementines I had to use and good ol' internet threw up a recipe for an Almond and Celementine Cake. It sounded so weird...I HAD to try it! :) It uses no oil or butter, so it is a bit of a dry cake that goes very well with tea. Not a OMG! I died and went to heaven kind of cake. Will I make I again? Maybe. I like the slight bitter taste it gets from the rind. And hello! Flour and butter free! No guilt! Most sites credit this recipe to Nigella Lawson, but I cant find it on her site.


      Mine cracked a bit on the top, with which came knowledge from more skilled bakers that cakes crack if the heat is too high. If your cakes often crack, even when you follow recipes to the T, it is just your oven overheating. Solution is to put the temperature at, for example 170C if the recipe calls for 190C or like my very bright friend Natasha suggested, turn the cake upside down and no one will know!

      You will need.
      454 grams Clementines. (Approx 5 medium sized ones.)
      6 large eggs
      1 teaspoon pure vanilla extract
      250 grams granulated white sugar
      1 1/2 teaspoons baking powder
      1/4 teaspoon salt
      225 grams ground almonds ( I had whole almonds which I ran through a blender)


       Method:
      1. Place the Clementines in a saucepan and cover with cold water. Bring to a boil and then simmer the Clementines for about 1 to 1 1/2 hours. Drain and let them cool completely.
      2. Preheat oven to 190 degrees C (375 F) and place rack in centre of oven. Butter and line a 8 inch (20 cm) springform pan with baking paper. Set aside.
      3. Once the Clementines are completely cooled, slice in half, and remove any seeds. Place the Clementine halves (skins and all) in your food processor and pulse until they are very finely chopped. Set aside.
      4. By hand or with a mixer, beat eggs until frothy. Beat in the vanilla extract, and then the sugar, baking powder, salt, and almonds. Stir in the chopped Clementines and pour into the prepared pan.
      5. Bake for about 1 hour, or until a toothpick inserted in the centre comes out clean (cover the cake with aluminium foil about the last 20 minutes of baking to prevent over browning). Remove from oven and place on a wire rack to cool. Once it has completely cooled, remove the sides of the spring form pan.
      6. This cake is best after a day or even two. It has a tendency to be a little bitter tasting just after baking but by letting it rest a day or two the flavours will blend and mellow.